Nuke a City Upgrade Priority Planner
A repeatable spend order from the first code to the first money research dump.
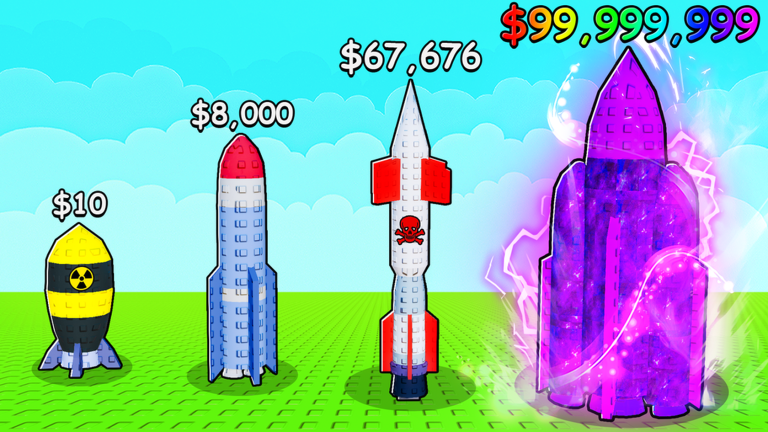
Use this planner when the shop is open and your brain wants to buy everything. Nuke a City pays you for a narrow sequence: claim the free code, deepen the dropper that actually fills explosives, take the plot expand that grants nuclear, refuse to sprinkle levels across every pad, rebirth when the curve is flat, and put research points into money before comfort. If you want the cash loop explained as a guide, jump to how to make money. If you want the RP ranks, jump to the research upgrades tier list. If you have not typed the code yet, open codes and come back.
Step 0: redeem BOOM before you “optimize”
BOOM is the live code. Type it through the in-game redeem UI (ABX / shop codes box) as soon as the plot loads. Playtime Points and a crate are not a late-game flex. They are a first-session gift. Redeeming after you already wasted twenty minutes hunting fountain levels is how people forget the code exists. New codes follow the same rule: claim, then spend. Do not hold BOOM for a rebirth you have not earned.
Step 1: max the current best dropper
Before expand, the best dropper is the free manual one. After expand, it is nuclear. Poison is the funded second, not the first. “Max” here does not mean you must hit the reported 1000 cap in one sitting. It means the next level on that dropper still beats a new object. If the next nuclear level is cheap relative to a fountain or a fuse unlock, buy the nuclear level. Spreading ten cheap upgrades across every pad is the failure mode this planner exists to kill.
Rocket upgrades toward the reported ~19 cap wait until the dropper that feeds the rocket is not starving. Fuse waits until you have explosives worth doubling. Fountain waits until leftover cash is actually leftover.
Step 2: expand the plot when nuclear is the prize
Plot expand is S-tier as an unlock, not as interior decorating. The expand that places the nuclear dropper, the rebirth statue, and the poison dropper is the one you save for. Extra land after that is a luxury. If you expand and then upgrade poison, fountain, and a decorative pad while nuclear sits at level 1, you did not follow this list. You bought a zoo.
Buy nuclear first on that land. Park poison as the A pickup once nuclear is no longer cheap. Ignore the blank-looking tiles. They are not a quest.
Step 3: do not spread upgrades thin
A useful check: if you cannot say which machine received your last three cash spikes, you are spreading. Pick one producer. Hit it until the next level feels stupid. Then, and only then, spill into poison or support. Dropper caps climbing toward 1000 exist to punish tourists who want every machine at 50. Fuse chain caps around the low 20s exist to remind you that fuse is a multiplier with a ceiling, not a second nuclear. Explosive visuals toward 24 are feedback, not a shopping list.
If two pads cost the same and one of them is nuclear, there is no puzzle.
Step 4: rebirth on a plateau, not on a mood
The statue wipes the plot. You keep research. Public runs often pay about five RP. That is a good trade when:
- Nuclear (or your current best) no longer moves launches in a way you can feel.
- You already fired the ready 100 EXP load.
- The RP will buy or finish a money node.
That is a bad trade when cheap nuclear levels are still on the pad, or when you want walk speed because you are bored of jogging. Boredom is not a plateau. After the reset, this planner starts again at step 1 with a stronger money multiplier behind it.
Step 5: dump RP into money first
Research spend is not a second planner. It is one rule with footnotes. Money multipliers are first. Production and cost are second. Walk speed, carry, and max totems are leftovers. Five-point payouts mean a B-tier vanity purchase delays the compounding that makes every later nuclear rebuild shorter. Confirm the ranks on the research upgrades tier list if you are tempted by a totem cap you cannot fill.
Then rebuild: starter dropper, expand, nuclear, poison as leftover, statue when the curve dies again. That loop is the whole late game.
One-screen checklist
- Redeem BOOM (and any new code on codes).
- Put cash into the current best dropper until the next level is no longer the cheapest win.
- Expand only when nuclear (plus statue and poison) is the unlock.
- Do not equalize every pad.
- Rebirth when launches stall and RP will buy money.
- Spend RP on money, then production/cost, then quality of life.
- Repeat.
If a step needs more words, it is usually a money-route problem, not a new machine. Open how to make money and run the loop until the planner feels obvious. The obvious version is the correct version.
Frequently Asked Questions
Quick answers to the most common questions.
What is the first thing I should buy?
Nothing in the shop. Redeem BOOM first, then level the dropper you already have. Expand only when the land grants nuclear.
When do I stop upgrading a dropper?
When the next level is worse than the nuclear expand, a rebirth money node, or a funded poison pickup. Until then, keep stacking the best producer.
Should I upgrade rocket and fuse early?
No. Rocket toward the reported ~19 cap and fuse toward the low-20s chain wait until the main dropper is fed and you have explosives worth multiplying.
Where do research points go in this order?
After a plateau rebirth, dump RP into money multipliers before production, cost, walk speed, or totem caps.
Why not buy every unlocked machine a little?
Because dropper upgrades can climb toward 1000. Thin spreads feel busy and lose to one nuclear stack plus a later poison pickup.